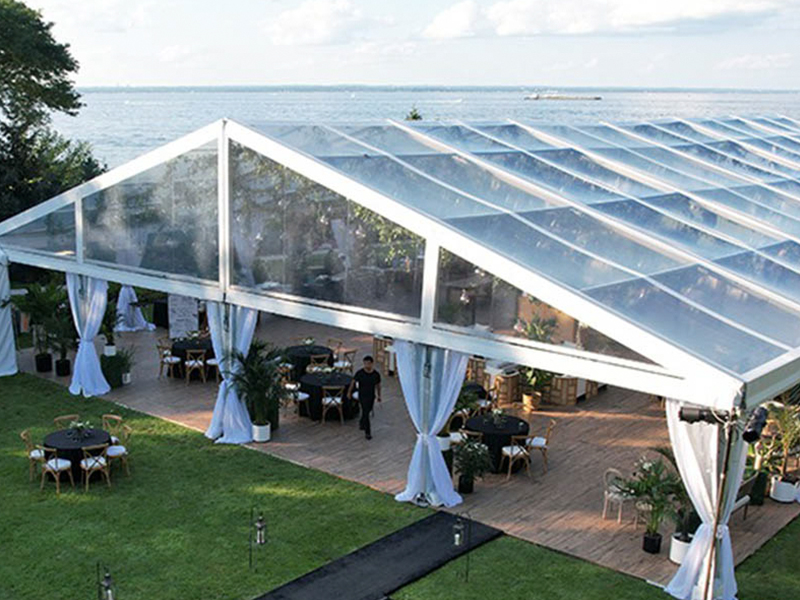
Canopy houses are becoming increasingly common in current life. From temporary security checkpoints to various wedding events, to industrial and environmentally friendly warehouses, the presence of tents can be seen.
Do you know how the tent, as a prefabricated building, is built step by step? Today, Sheng Yixin will take the A-Frame tent as an example to explain the installation and construction steps of outdoor tents.
01. Measure and place materials according to the size of the tent and site
The construction project pays attention to every detail, from the placement of the position to the spacing between the feet, all of which are carefully measured and placed according to the requirements. Every screw is tightened to ensure safe construction.
02. Based on the ground conditions, position and fix the foundation
The tent may have different fixing methods depending on the ground conditions. Before the installation of the tent, it is necessary to perform foot positioning to ensure the safety of the tent and to ensure the fast and efficient construction work.
03. Connect the A-Framebeam with a mountain tip joint
The A-Frame beam, as the main beam of the tent, is one of the main components of the tent.
04. Reinforcing plate connection between column and A-Frame beam
As an assembly structure, there are no extra pillars inside the tent. So the requirements for this column are very high.
The span of the tent ranges from 3 meters to 60 meters. The higher the height and span of the tent, the larger the specifications of the columns, and the thicker the thickness will be.
05. Connection and fixation of columns and footings
06. Use tools to erect the frame
Small and medium-sized shelters can use forklifts, while large shelters require equipment such as forklifts and cranes.
07. Install the diagonal braces between the two frames
Scissor braces, also known as cross braces. Two steel pipes are continuously crossed and erected, and the X-shaped shape can enhance longitudinal rigidity.
08. Install the end face hanging pipe
09. Install small square tubes between two frames
The small square tube connects two frames of the tent, and the installation of the small square tube can prevent water accumulation at the top of the tent, further ensuring the safety of the tent in rainy and snowy weather.
10. Continue to erect the frame and install small square pipes, etc
The distance between the two frames of a tent is generally 3 meters or 5 meters, forming one room. The tent can be infinitely extended, with no length limit.
11. The installation of the tent frame is completed
The frame of Shengyixin's tent is made of aluminum alloy material 6061-T6, high-strength industrial aluminum alloy, lightweight, durable, and corrosion-resistant.
12. Install the top tarpaulin.
Sheng Yixin uses high-quality PVC double-layer knife to scrape the tarpaulin. Double sided waterproof, flame retardant, soft and easy to fold, it won't harden even in winter. And there will be no folding damage after multiple folds. At the same time, the top tarpaulin is also equipped with an anti UV thermal insulation film for sun protection and thermal insulation.
13. Install the cloth pressing rod and use a tensioner to adjust and tighten the tarpaulin
14. Install the mountain canopy and fix the canopy
15. Install the surrounding cloth
There are multiple materials to choose from for the walls around the tent. In addition to conventional PVC tarpaulin, tempered glass, ABS hard walls, color steel composite panels, color steel sandwich panels, rock wool sandwich panels, etc. are also available. Common wall materials used for board houses can be used as tent walls.
16. Install the end face fence and glass door
Glass doors are not standard, customers in need can consult customer service to make a purchase. Compared to ordinary tarpaulins, glass doors can achieve a more beautiful appearance.
17. Counterweight installation
When installing and fixing the tent, different fixing methods such as expansion screws, steel drills, and counterweights will be used according to different ground conditions and customer needs. For wind resistance, the pre embedding effect is better than counterweights, and it is not a problem to resist wind of level 10. In windy weather, the interior of the tent can also be used normally or events can be held.
18. The installation of the tent is completed
There are no extra columns inside the tent, and the clear span space can make the site larger and more open. At the same time, there are various styles of tents, including A-frame, pointed roof, peach shaped, and irregular combinations.
A covered house, like a regular house, has complete supporting facilities. Air conditioners, exhaust fans, spray devices and other electrical equipment can be installed inside.


Hi! Welcome back.
How are you doing?

+86 17712768856
NO.1319-1 Xicheng Rood Qingyang village, Jiangyin City,Jiangsu Province,China
Subscribe today and get educated and entertained with the monthly SYXTENT email